søndag den 28. april 2013

Skyrim - Nightingale armor #8

5 days left until SVScon and I'm DONE!!xDD
Holy BLEEP am I happy I managed to do this! I've never done a project this big but Ohmy*¤#%FEELS!! IT FEELS AWESOME!!!xDD
.
.
.
Okay I'll stop now and just post the pictures^^0

So GLOVES!
I've never made gloves before and certainly not with a fabric that doesn't stretch, but after the thumb was in place it went relatively smoothly:)


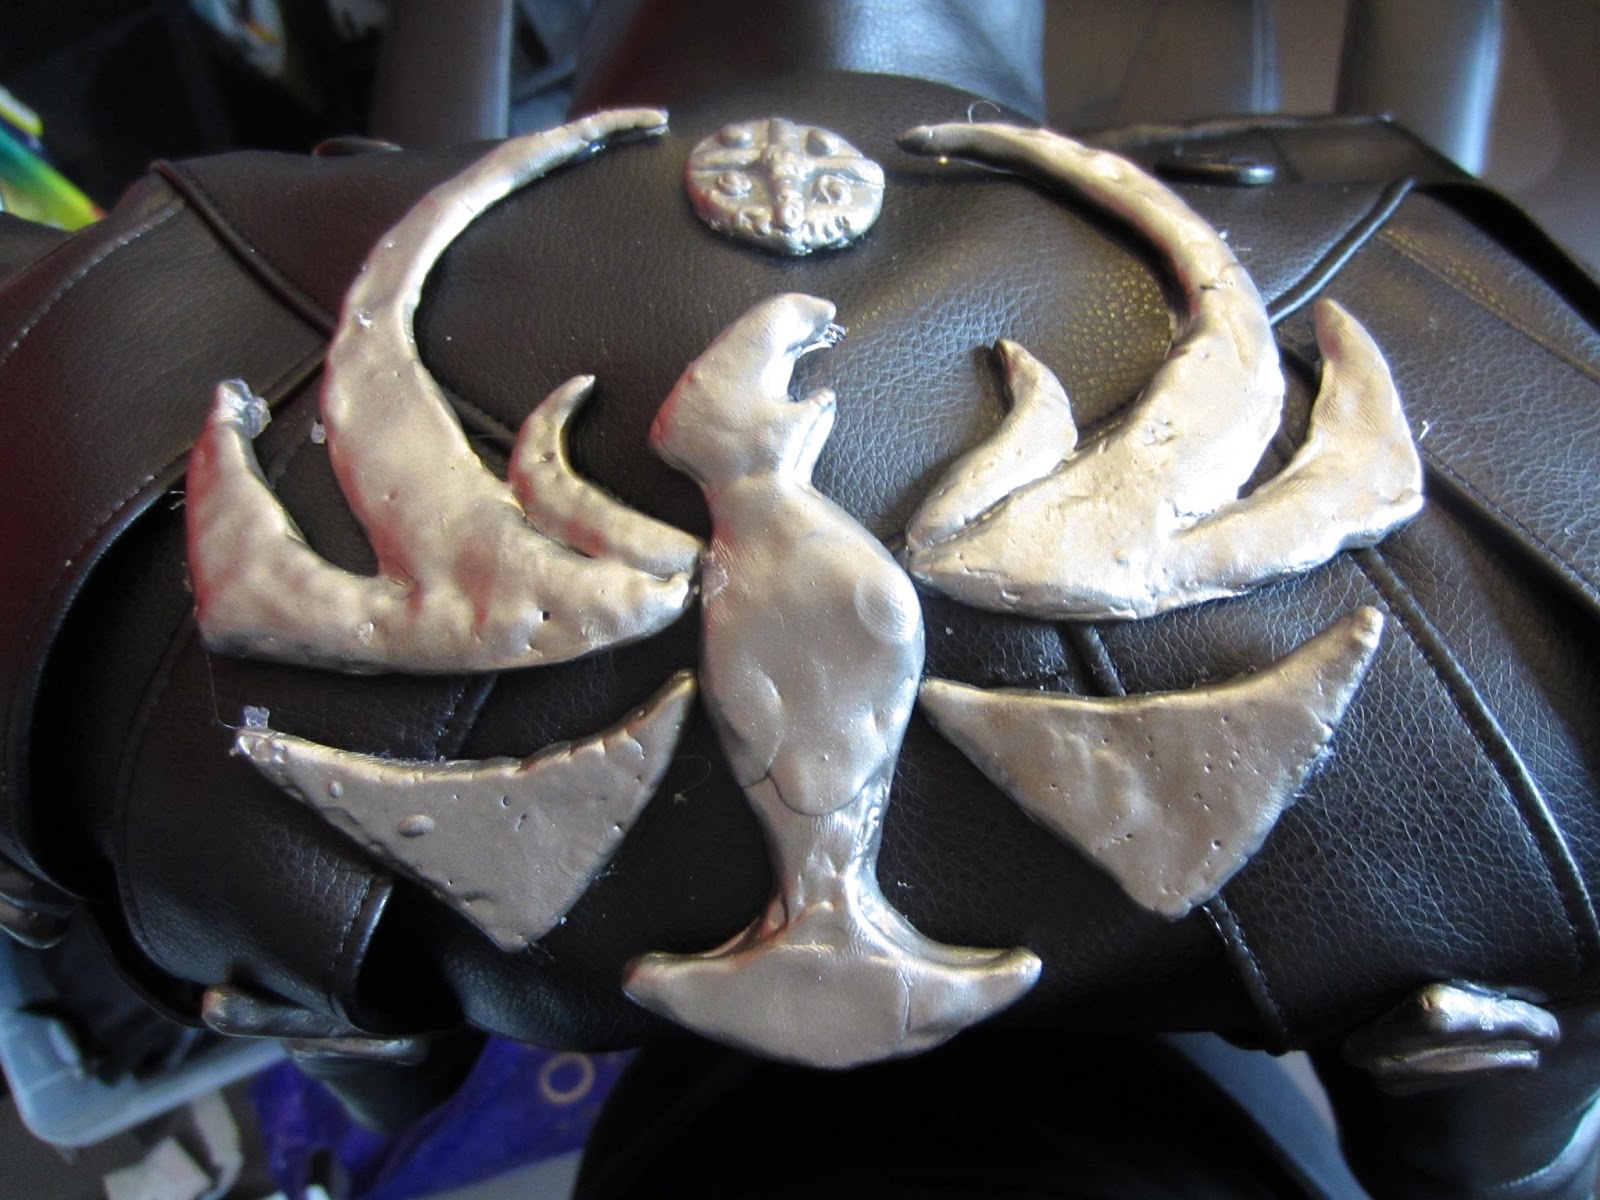
Pretty pretty details^^ Now moving on to something I was really excited about, the metal decorations!

#First I made them of clay

#Then I cast it in plaster!

#And THEN I filled the cast with Worbla's deco pellets which is this really cool plastic-like material which melts when its heated!
 
#Heating up the whole thing with boiling water and TADAH a plastic bird!^^

#Finally I painted it over with spray paint, I actually painted it twice because the first paint I bought was really crappy so I had to go buy another one-_-0
This is the second time I've done this mistake so now I'll just say it to whoever might benefit, DON'T buy spray paint on sale! It is never good-3-


Moving on to the final! The shoulders were a pain because trying to make something round out fabric really isn't that easy, but I think it went okay^^


An now it is time.... FINAL PICTURES!!!!


Thank you all for following my progress^^
I hope to see a lot of lovely people in Herning, I'll be there... watching you from the shadows#stealth100

~byexD


søndag den 7. april 2013

Skyrim - Nightingale armor #7


Hi all!^^
So I've bought and paid for my ticket to this year's SVScon which gives me little less than a month to finish this thing... not stressed at all!*dies*

Okay so I've sewn together the skirt WHoop!


Just needed the front flap which was actually not just one flap but two, looking like this.
aand done!

Moving on. Due to some bad moving confusion the cloak I made back last year has been lost-_- I tried looking everywhere but it's completely gone so here is the new and improved replacement!


And then the mask... no, needles and face isn't fun the second time around either
-3-


 And this is how it looks when I put it all on! Picture's pretty crappy since I can't seem to manage to do the whole camera-up-against-mirror-thing but I swear no words can describe the amount of awesome I felt wearing this!XD


Bye~

søndag den 24. marts 2013

Skyrim - Nightingale armor #6

Hi all!^^
Time again for another photodump, this time working on the "skirt" of the armor.

So I started out with the belt, which is made up of these two lovely pieces!


Then we add the first little piece of the skirt...


 And then comes the many MANY other pieces^^0


Adding some details(and getting painfully acquaintanced with needles againT_T)


 And one suddenly has something that looks like this, yay!^^

Pretty pretty details, makes me really glad I choose to work with this material... even if I do complain about it a lot^^0


Fshgskghjkdhg*needles!!*

And the end result is this! Still a while to go yet, but sewing the remaining pieces together should be child's play after adding the details---should being an important keyword herexP


 ~bye


torsdag den 31. januar 2013

Skyrim - Nightingale armor #5


Hei guys and welcome back to the cave!^^

First semester is over together with the exams and I've had several days break before starting again so this is what I've managed to make throughout January. Get ready for picture dump!
 
Starting out with the chest piece.
The straps is going to be fastened too this one..


And continuing on with the many MANY pieces which make up the "stomach" of the armor.


This is the upper middle piece, which sits right under the bust and to create the same pattern, like the one in the game, another piece is cut out and both of them fastened, like this:


This was the first middle piece, now I just need two more -3-

 
Okay so now with that done, remember the funky piece from my last post? Yea I need two more of those as well s here we go!


You put them together and add a whole lot of needles and then you've got!

The needle monster 2.0!! 


It was a complete nightmare putting this thing on, but oh well, sacrifices have to be made... in this case it was the skin on my arms and stomach that had to suffer-.-0

Moving on to the back!
Before I start sewing the needle monster together I had to make sure I could close the back. I went with hooks instead of a zipper because they're not that noticeable and they're also a bit easier to move in case(god forbid) I actually lose a bit of that christmas stomach I grew over the holidaysxP


So I sew on this extra piece of fabric, and in between the two I sew on the eye, as seen below:


 Peekaboo!:P Pretty easy now on to the hook...

 
Which also went rather smoothly.

Now after I made sure the back fit, fastened the front pieces with needles and taking the armor on and off more times than I bothered to count! I was finally able to sew the front pieces together and this was the final result^^ 


TADAA!!xD 
That's it for this time!
Next up: finishing the neck and then moving on to the skirt, until then.
~Bye